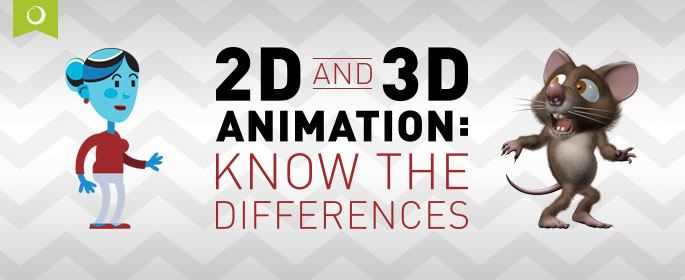
If you think you’ll need special glasses to view 3D animation, this post is for you.
Kidding (sort of).
But often, people are confused by the differences between 2D and 3D animation, and especially the processes involved in creating each type. There isn’t a better type of animation, but it’s important to understand how they each work to determine which is a better fit for your timeline and goals.
Each can serve a multitude of purposes and styles, all depending on the vision and goals of the project. While 2D animation appears flatter, it can still result in a clean, sophisticated appearance. Likewise, it can also be created with a unique, illustrated appearance that can work well for many projects and brands. 3D animation gives you a full range of motion once a character is rigged – which we’ll explain in a moment. You can actually see around the final character, which gives it that crisp, life-like appearance.
We created the following 2D animation for the New York Council on Problem Gambling.
[youtube]https://www.youtube.com/watch?v=2-q69fDXD24[/youtube]
This 3D animation was created by our motion team for the University at Albany during the 2013 holidays.
[vimeo]https://vimeo.com/80823088[/vimeo]
Jeff Fugelsang, a motion graphics designer on Overit’s Motion team, likens the comparison between 2D and 3D animation to the difference between drawing and sculpting. Either form can be customized to fit a wide range of styles and purposes, so selecting a technique really comes down to the client’s preferences, goals, timeline and budget.
How 2D and 3D Animations Are Created
The process for creating both 2D and 3D animations typically begin the same way, and then the path forks.
Regardless of the animation style, animators will initially learn about the vision and goals that the client has going into the project. They will create concepts and then illustrated storyboards to bring these ideas to life. Once a storyboard is approved, it enters the animatic stage, moving the images into the appropriate animation software – which will be different for 2D and 3D. The animatic is where sound clips and voiceover are added and motion is introduced to the characters. This is where things get vastly different.
When a 2D character is drawn, the animator must illustrate the key poses and scenes, including a drawing in every frame, with 24 frames per second being the standard. Depending on the pace of the animation, a character drawing can remain still for a few frames at a time. The same is rarely true for 3D animations, which need to be in near-constant motion to keep their realistic appearance. It can be subtle, but living things blink, breathe and shift their posture, so realistic 3D animations must do the same. After the animatic is created, the animator then works to model and rig the character. Modeling is essentially the process in which the character is built, and then the rigging builds the character’s skeletal structure underneath that allows animators to control the movements of the character. It’s a bit like creating a puppet.
Watch our mascot Stu get modeled!
[vimeo]http://vimeo.com/61559324[/vimeo]
Below, you’ll find an image of 3D character rigging in progress.

Time Investments for Creating 2D and 3D Animations
Timing will be entirely dependent upon the project, and either can be created more quickly – or slowly- based on various creative factors and client requests. Creating a 3D animation is typically more time-intensive up front, with the need to rig the character. It’s a highly-detailed process, but once it’s completed, the animators can re-use the character and change its poses over and over again – which is an advantage for characters that will have a long life-span with their brand (i.e. The Geico gecko) or for us, the Catseye characters we created at Overit. This is also why 3D animations are more time-efficient and cost-effective for animated features from companies such as Pixar.
2D animations can be created more quickly for a specific video, and the work of the project is typically more evenly distributed throughout the process. A different version of character rigging happens here, by using the ‘puppet pin’ tool to make bendable points in the character’s anatomy (elbows and knees, for instance). A rigged 2D character can be shown in phases throughout the process, allowing for more minor changes and flexibility (make him raise both arms, not just one!)

Deciding Between 2D and 3D Animation
Creating a 3D animation requires a strong understanding of the project between the client and animators, as a lot of work will happen in the initial rigging process. The process in which the computer compiles all of the animation work into video format typically takes longer, as well. However, once it’s done, it can be repurposed for future animations relatively easily.
In order to create a new video with a 2D animation, you may need to draw new angles and positions for the character rigs, which will take more time if the necessary angles and puppet pins haven’t been created upfront. If you can plan ahead from the outset of your initial project, you can communicate these potential needs for the future with your animation team. They can then work to create the proper angles and puppet pins ahead of time – for this project and future projects, so changes are easier to implement for future animations.
How do you decide? A lot depends on your visual preferences, but also consider questions such as:
- Do we plan on re-using this animated character in future videos or advertisements?
- Are we looking for a (potentially) permanent mascot or symbol for our brand?
- Do we want to experiment with different characters in the future to target other segments?
- What’s our timeline?
- What’s our budget?
- Where will these animations be displayed?
- Should our animation be character-based, or information/process-based?
It’s important to have a good vision of the final video you wish to create, the audience you want to reach with it and the goals you wish to achieve, as they will heavily influence the decision to create 2D and/or 3D animations. Once you and your animation team both understand the intended purpose and goals for putting the animation to use, it’ll become easier to decide which techniques to adopt.


